Preview changes on the website by uploading to the local iFrame
It looks like now we have a series of articles related to image upload and processing – starting from “Preview image before uploading” through “Resize an image using canvas” to “Sending upload image contents to the server before form submission“. Now, as the continuation of the series, I want to give you one more useful piece of code.
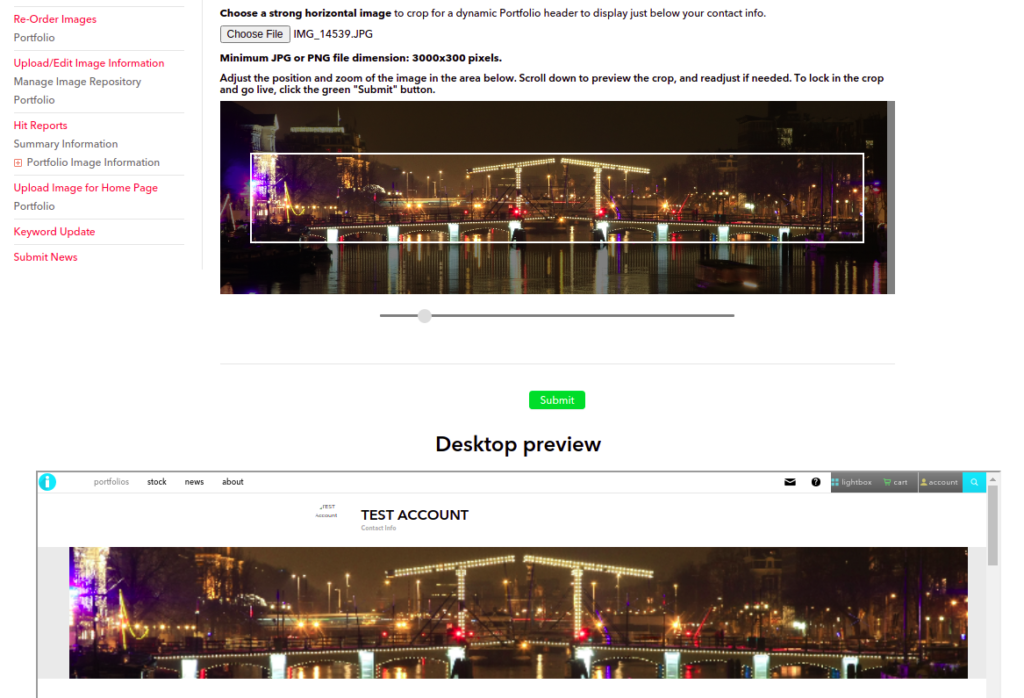
In my case, users are uploading hero images, which are displayed on top of their portfolio pages. So, the browser is loading the image from the drive, once it is selected in the upload form, I perform resize in canvas, and I’m sending the result to the server. But I also display the resulting page preview – once the image is resized, I send it to the iFrame, which is also visible on the page – so the user is able to see how the page will look like before the actual change is made.
I will skip the image preview and resize engines because they were described in previous posts – I will now focus on the iFrame preview of the page. Our goal is to send the resized image to the server and load the resulting page in the iFrame.
Prerequisites
I assume that you already have:
- Form with the file upload field
- The engine that loads the file once selected into the canvas and performs resize
- The page that is displaying the image once the form processing is done
Now we will focus on how to create a preview of the page. In my case, the preview is triggered by the zooming engine, but it can also be executed by click on the button.
Page elements
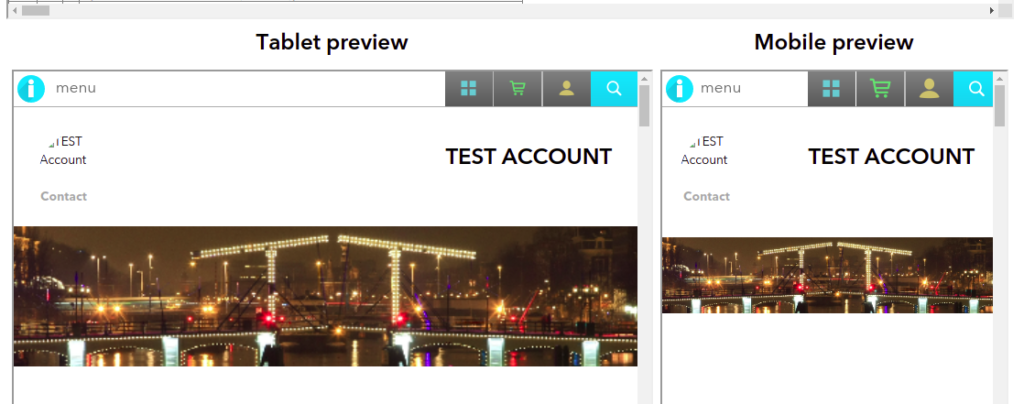
I’m using multiple iFrames to display how the page will look on Desktop, Tablet, and Mobile screens. I also perform a zoom on the iFrames to keep them in reasonable size while displaying in the user interface.
In the background, there is a form that is handling the iFrame refresh action. In my case – three forms since I have three iFrames and I want to refresh them simultaneously:
<form target="desktopPreview" method="POST" action="/my/preview/page.html" name="previewFormDesktop">
    <input type="hidden" name="imPreview" value="">
</form>
<form target="tabletPreview" method="POST" action="/my/preview/page.html" name="previewFormTablet">
    <input type="hidden" name="imPreview" value="">
</form>
<form target="mobilePreview" method="POST" action="/my/preview/page.html" name="previewFormMobile">
    <input type="hidden" name="imPreview" value="">
</form>
Please note the “target” attributes on the forms. The names correspond with the iFrames I’m using to preview the page:
<div style="text-align: center;">
    <h2>Desktop preview</h2>
    <iframe id="desktopPreview" name="desktopPreview" src="/my/preview/page.html" style="width: 1100px; height: 80vh; margin: 10px auto;"></iframe>
</div>
<div style="text-align: center; padding: 0 4px;">
    <h2>Tablet preview</h2>
    <iframe id="tabletPreview" name="tabletPreview" src="/my/preview/page.html" style="width: 700px; height: 80vh; margin: 10px auto;"></iframe>
</div>
<div style="text-align: center; padding: 0 4px;">
    <h2>Mobile preview</h2>
    <iframe id="mobilePreview" name="mobilePreview" src="/my/preview/page.html" style="width: 380px; height: 80vh; margin: 10px auto;"></iframe>
</div>
My zoom engine is triggering the preview function on each zoom adjustment, but as I wrote before, you can use a button to trigger preview. The preview function is rather simple:
function previewImage() {
    baseImage = canvas.toDataURL();
    document.previewFormDesktop.imPreview.value = baseImage;
    document.previewFormTablet.imPreview.value = baseImage;
    document.previewFormMobile.imPreview.value = baseImage;
    setTimeout(function(){
        document.previewFormDesktop.submit();
        document.previewFormTablet.submit();
        document.previewFormMobile.submit();
    }, 50);
}
From the frontend point of view, that’s all. The rest of “the magic” is happening on the server and in the stylesheet of the preview page.
Backend and styling
The image is sent to the “/my/preview/page.html” as a Base64 encoded string in the “imPreview” form field. Now, the processing of such an image depends on the programming language you are using. Since I don’t want to save it to the drive, but simply I need to “display” it, I’m using it as the background image of Base64 type:
if isDefined("form.imPreview") {
    <div class="heroImage">
        <div style="background-image: url(#form.imPreview#)" ></div>
    </div>
} else {
    // regular code of the hero image displaying
}
The above example is not written in any particular language; it simply shows how I’m using Base64 encoded image in the style tag of my DIV element. This code is executed on the server. This means that the server is sending back the page with the preview image embedded in the code. As I wrote, no need to save it on the disk or serve in any other way.
As the last adjustment, since the desktop preview page is displayed in the limited width iFrame, I’m performing page zoom. I’m displaying it using 50% zoom. It is defined as the class on the <HTML> element:
<!doctype html>
<html lang="en-US" class="previewZoom50" >
    <head>
        [...]
    </head>
    <body>
        [...]
    </body>
</html>
The definition of the style, in this case, is also simple:
.previewZoom50 {
    zoom: 50%;
}
For some elements, it may cause issues – especially when the size is defined in viewport width or viewport height because it is not calculated properly in some cases. For such elements, you will need to adjust styling.