Handle website forms on ESP8266
It is handy to configure the ESP8266 module through the website instead of hardcoding the variables in the script itself. It is more user-friendly and allows someone else to interact with your script – without knowledge of Arduino IDE or how to work through the serial port. In this post, I will cover the basics of website-based interaction using HTML forms.
Preparation
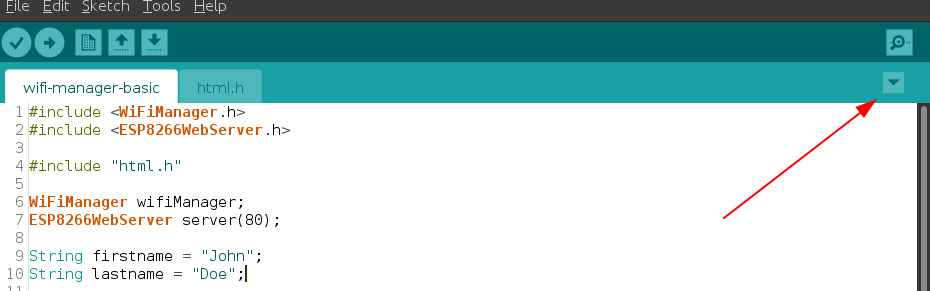
Because our HTML pages will contain common elements, such as header and footer, form header, and form footer, I prefer to put these constant texts in a separate file. In the Arduino IDE, if you want to create one, click on the arrow button on the right and select New Tab:
On the bottom of the editor, you will then see the prompt. Enter the file name (in my example – html.h) and click OK:

In the newly created file, paste the following HTML code as const variables:
const char HTML_header[] = R"=====(
<html>
  <head>
      <title>Form handler</title>
  </head>
<body>
)=====";

const char HTML_footer[] = R"=====(
    </div>
  </div>
</body>
</html>
)=====";

const char HTML_form_header[] = R"=====(
  <form action="/save" method="POST">
)=====";

const char HTML_form_footer[] = R"=====(
    <input type="submit" value="Save">
  </form>
)=====";

const char HTML_saved_link[] = R"=====(
  <a href="/" >Information saved - click here to return to the homepage</a>
)=====";
Now we have the basic structure of the HTML pages ready. We can start coding the script itself. Return to your main code file (switch the tab in the editor), and start with the includes, variables, and setup:
#include <WiFiManager.h>
#include <ESP8266WebServer.h>
#include "html.h"

WiFiManager wifiManager;
ESP8266WebServer server(80);

String firstname = "John";
String lastname = "Doe";

void setup() {
  Serial.begin(115200);
  Serial.println("Booting");
  delay(2000);
  wifiManager.autoConnect();

  initialize_www();
}

void loop() {}

void initialize_www() {
  server.on("/", handle_root);
  server.on("/save", HTTP_POST, handle_form);
  server.onNotFound(handle_not_found);
  server.begin();
}
In the above code, I included three things: WiFi Manager, which is described in more detail in one of my posts, Web Server which will handle communication between ESP board and the browser, and the “html.h” file which contains my common HTML elements. Next, I declared variables for WiFi Manager, for the Web Server (on port 80 which is the default), and two String type variables to hold the values we will change using the form.
The setup function is handling the WiFi connection through WiFi Manager and it calls the “initialize_www” function. The “initialize_www” function is configuring Web Server – it tells the server that it should serve two pages – the first under the root address (which is “/”) handled by the “handle_root” function, and the second under the “/save” address handled by the “handle_form” function. All others, not found in the configuration should be handled by the “handle_not_found” function.
The “/save” handler is prepared for the “POST” type requests. I prefer this type of form request because variables are not visible in the URL and they can handle more data at once. There are more pros and cons, but I will not get into detail. The method in which the HTML form will send data is configured in the HTML form header (in the “html.h” file).
In the initial version of this post, I forgot to add a loop function which may cause errors if you are not aware that such a function is required by the Arduino compiler. In the code above it is now added thanks to one of the commenters.
Handlers
Now it is time to take a look at handlers themselves. I tried to make them as short as possible:
void handle_root() {
  String head = HTML_header;
  String foot = HTML_footer;
  String formhead = HTML_form_header;
  String formfoot = HTML_form_footer;

  String content = "<p>My name is: " + firstname + " " + lastname + "</p>";
  String formcontent = "Enter new Firstname: <input type=\"text\" name=\"firstname\" value=\"" + firstname + "\"><br />Enter new Lastname: <input type=\"text\" name=\"lastname\" value=\"" + lastname + "\"><br />";

  server.send(200, "text/html", head + content + formhead + formcontent + formfoot + foot);
}

void handle_form() {
  String head = HTML_header;
  String foot = HTML_footer;
  String link = HTML_saved_link;

  if ( server.hasArg( "firstname" ) && server.arg( "firstname" ) != NULL ) {
    firstname = server.arg( "firstname" );
  }
  if ( server.hasArg( "lastname" ) && server.arg( "lastname" ) != NULL ) {
    lastname = server.arg( "lastname" );
  }

  server.send(200, "text/html", head + link + foot);
}

void handle_not_found() {
  server.send(404, "text/plain", "Page not found");
}
The “handle_root” is taking care of the main page. It displays the current value of my variables, followed by the form in which the user can change these variables. The form is also filled with the variable contents, so it is easy to adjust something instead of typing the whole variable again. In the function, I used the HTML elements I prepared in the “html.h” file. In the end, I simply send everything glued together as a long String value.
The “handle_form” is taking care of each of the variables sent by the root page. For each variable I’m checking if it is available (“server.hasArg”), then if it is not NULL (by checking “server.arg” contents). If the variable is present and filled, I can assign the value provided in the form to the configuration variable in my script. At the end of the handler, I prepare the response which is again glued from the HTML elements – header, link, and footer.
The “handle_not_found” is the easiest of them. It only sends the information that the page doesn’t exist. You can see that the response code is now set to 404 (Page not found) instead of 200 (OK).
How does it look like?
The basic HTML code I used in my examples will not produce fancy HTML pages. It will simply work. Once you will launch your script on the module, you will be able to connect to the IP of the board and see the root page:
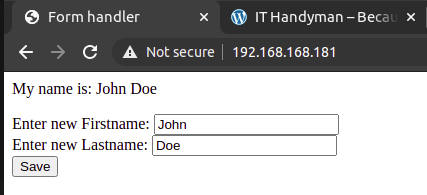
You can enter new values in the form fields and click Save. The board will respond with the form handler:
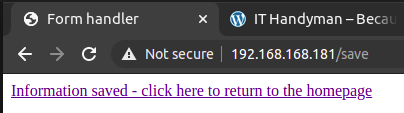
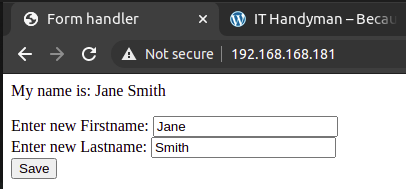
You can click on the link, and it will take you to the root (home) page. The new values are now visible:
Afterword
Using the simple form as above, you can now interact with your board. You can use this to provide configuration variables. If you want to preserve them when the board is turned off or reset, you can save them to the file. Enjoy!
Thanks for writing this article, probably worth reminding people to put the void loop() {} lines at the bottom or they’ll run into errors when running this sample code.
Oh, what a mistake! Thank you for pointing this out 🙂