ESP8266 + Websockets = streaming data from the ESP module
I started work that requires frequent data transmission from the ESP module. In fact – multiple ESP modules are located in various places, so I have to use the Internet to collect the data.
If the module is located nearby, you can connect to the serial port and read the data directly from the board. This is rather fast and easy to implement. The problem is that sometimes your ESP8266 (or ESP32) is remote and the only way to connect is through the Internet.
In my previous posts, I wrote about IoT Impulse Counter (used to collect electricity data), I also described Client-Server communication (in my case – used to collect thermometer data). In both cases, the frequency of communication is not crucial. I log the data once every minute, sometimes even not that frequently.
Frequent data updates issue
When talking about the data that has to be transferred frequently, the typical client-server approach is too slow. It can take 100-150ms for single communication. If you want to transfer 20-50 packets of data per second, this is way too slow.
Of course, you can gather this data and send it in one bigger package, but this was not the way I wanted to analyze the information. I needed the data to be sent almost in real-time. The solution for me was the usage of Websockets – the communication protocol that allows full-duplex through the channel that is constantly open.
Websockets library
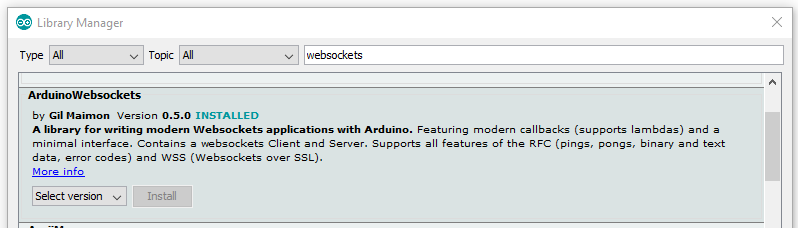
In the Arduino IDE, there is a Library Manager (menu Tools -> Manage Libraries) in which you can find and chose the Websockets library for your project. I decided to use ArduinoWebsockets provided by Gil Maimon:
The setup
In order to communicate through Websockets, ESP needs to be connected to the network. The setup part contains the connection parameters (WiFi SSID, password), defines the number of clients that can connect simultaneously, and creates the variables for clients and server. (Update on 2021-02-17: check my new post on WiFi Manager for easy network management)
#include <ESP8266WiFi.h>
#include <ArduinoWebsockets.h>

using namespace websockets;

const char* ssid = "mynetwork"; // The SSID (name) of the Wi-Fi network you want to connect to
const char* password = "mynetworkpassword"; // The password of the Wi-Fi network
const int maxClients = 4; // Accept up to 4 connections
int clientsConnected = 0;

WebsocketsClient clients[maxClients];
WebsocketsServer server;

void setup()
{
  Serial.begin(115200);

  WiFi.hostname("ESP-websockets");
  WiFi.begin(ssid, password); // Connect to the network
  Serial.print("Connecting to ");
  Serial.print(ssid); Serial.println(" ...");
  int i = 0;
  while (WiFi.status() != WL_CONNECTED) { // Wait for the Wi-Fi to connect
    delay(1000);
    Serial.print(++i); Serial.print(' ');
  }

  Serial.println('\n');
  Serial.println("Connection established!");
  Serial.print("IP address:\t");
  Serial.println(WiFi.localIP());

  server.listen(81);
}
In my example, my server is listening on port 81. I’m using this port because I want to be able to run my webserver at the same time on port 80.
Main loop
The main loop of the program takes care of two things. It is checking if there is a new client connection waiting and it is taking care of the messages sent by clients (it is polling all connected clients). In my example, I allow up to four clients to connect. Each client connection is assigned the onMessage event to handle the communication.
void loop()
{
  if (server.available())
  {
    // if there is a client that wants to connect
    if (server.poll() && clientsConnected < maxClients)
    {
      // accept the connection and register callback
      Serial.print("Accepting a new client, number of client: ");
      Serial.println(clientsConnected + 1);

      // accept client and register onMessage event
      WebsocketsClient client = server.accept();
      client.onMessage(onMessage);

      // store it for later use
      clients[clientsConnected] = client;
      clientsConnected++;
    }

    // check for updates in all clients
    pollAllClients();

    delay(10);
  }
}
Clients polling and handling the data transfer
The “pollAllClients” function is called in the main loop. It reviews each of the open communication channels looking for the message from the client. Once the message is received, the onMessage function is called. Let’s take a look at the utility functions:
// prepare data to be sent to a client
String prepareData()
{
  String dataToReturn = "time: " + String(millis()) + "\r\n";
  return dataToReturn;
}

// this method goes through every client and polls for new messages
void pollAllClients()
{
  for (int i = 0; i < clientsConnected; i++)
  {
    clients[i].poll();
  }
}

// the client that sent the message gets the data in response
void onMessage(WebsocketsClient &client, WebsocketsMessage message)
{
  int repeatCount = message.data().toInt();
  Serial.print("repeat: ");
  Serial.print(repeatCount);
  Serial.println(", Sending Data.");

  for (int i = 0; i <= repeatCount; i++) {
    client.send( prepareData() );
  }
}
As you can see, “pollAllClients” is really simple. The “onMessage” function is a little bit more complicated, but this is for a reason. I wanted the client to send the number. This number is used to determine how many packets of data should be sent back. This way I can allow the client to decide. If there is nothing sent by the client, one packet is sent back.
The data is prepared in the “prepareData” function. My example is really simple, but in my production environment, this function gathers the data from various variables and join them.
Conclusion
As you can see, in a few easy steps you are able to create a communication channel between your ESP module and the client. It allows you to gather data quickly and receive tens of data packets per second. Even hundreds per second if your ESP program is fast. Below you can find the whole source code of the program. You can also find this example of the ESP8266 WebSockets server on my GitHub.
#include <ESP8266WiFi.h>
#include <ArduinoWebsockets.h>

using namespace websockets;

const char* ssid = "mynetwork"; // The SSID (name) of the Wi-Fi network you want to connect to
const char* password = "mynetworkpassword"; // The password of the Wi-Fi network
const int maxClients = 4; // Accept up to 4 connections
int clientsConnected = 0;

WebsocketsClient clients[maxClients];
WebsocketsServer server;

void setup()
{
  Serial.begin(115200);

  WiFi.hostname("ESP-websockets");
  WiFi.begin(ssid, password); // Connect to the network
  Serial.print("Connecting to ");
  Serial.print(ssid); Serial.println(" ...");
  int i = 0;
  while (WiFi.status() != WL_CONNECTED) { // Wait for the Wi-Fi to connect
    delay(1000);
    Serial.print(++i); Serial.print(' ');
  }

  Serial.println('\n');
  Serial.println("Connection established!");
  Serial.print("IP address:\t");
  Serial.println(WiFi.localIP());

  server.listen(81);
}

// prepare data to be sent to a client
String prepareData()
{
  String dataToReturn = "time: " + String(millis()) + "\r\n";
  return dataToReturn;
}

// this method goes through every client and polls for new messages
void pollAllClients()
{
  for (int i = 0; i < clientsConnected; i++)
  {
    clients[i].poll();
  }
}

// the client that sent the message gets the data in response
void onMessage(WebsocketsClient &client, WebsocketsMessage message)
{
  int repeatCount = message.data().toInt();
  Serial.print("repeat: ");
  Serial.print(repeatCount);
  Serial.println(", Sending Data.");

  for (int i = 0; i <= repeatCount; i++) {
    client.send( prepareData() );
  }
}

void loop()
{
  if (server.available())
  {
    // if there is a client that wants to connect
    if (server.poll() && clientsConnected < maxClients)
    {
      // accept the connection and register callback
      Serial.print("Accepting a new client, number of client: ");
      Serial.println(clientsConnected + 1);

      // accept client and register onMessage event
      WebsocketsClient client = server.accept();
      client.onMessage(onMessage);

      // store it for later use
      clients[clientsConnected] = client;
      clientsConnected++;
    }

    // check for updates in all clients
    pollAllClients();

    delay(10);
  }
}
This is really helpful, however could you also include the client side code.
Hello Matt,
It really depends on what language you want to receive the socket communication. The easiest way is to use your browser and JavaScript:
// Create WebSocket connection.

const socket = new WebSocket('ws://localhost:8080');
// Connection opened
socket.addEventListener('open', function (event) {
socket.send('Hello Server!');
});
// Listen for messages
socket.addEventListener('message', function (event) {
console.log('Message from server ', event.data);
});
The example above is taken from: https://developer.mozilla.org/en-US/docs/Web/API/WebSocket
In my article, I used the port of 81 to listen to the connection, and the IP – you should obtain this information from your router (which IP was passed to your ESP module) so the connection string should look like this:
const socket = new WebSocket('ws://[IP.OF.ESP.MODULE]:81');Thank you for this, very cool! I have done client/server stuff before but am new to websockets, hopefully I can ask some questions –
1) How would this work if you wanted to ship ESP32 devices to different customers, and then let these customers stream in their ESP32 data using a separate internet-connected client (e.g., web browser) via websockets? Can it work like this?
2) Does this only work if the ESP32 is on the same WiFi network, or can websockets also be used if the device is on a different network / remote?
3) In either case, what kind of configuration / setup is required? I saw you wrote something regarding needing the IP address(es) – is static IP required in this case (on either the client device, or the ESP modules)? Is looking at the IP address assigned by the router the only way (i.e., if potential customers are both remote and non-technical, would such a setup be painful)?
Thank you!
Hello Derrick,
I found your questions thought-provoking, so I wrote a short article to address them: ESP8266 and ESP32 websockets considerations